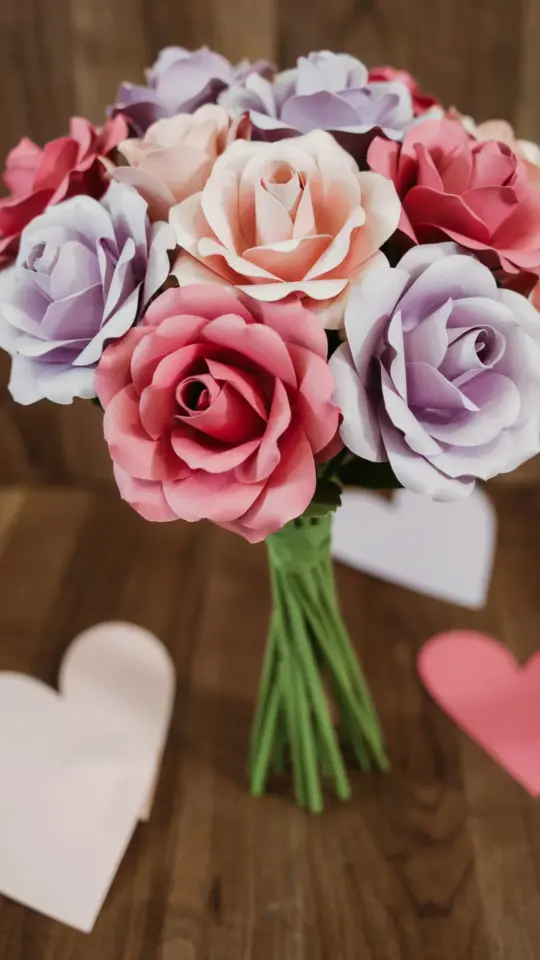
I first tried making cardstock paper flowers because I needed a romantic gift that wouldn’t break the bank. You know that feeling when you want to give something handmade, but every craft store trip ends with a receipt that makes your wallet cry? That is exactly why I started experimenting with plain cardstock and simple folding techniques. These cardstock paper flowers are not just easy on the eyes; they are easy on your budget too. And the best part? You likely already have everything you need in your desk drawer.
Why choose cardstock over expensive craft paper
Real craft paper can cost a fortune. I have seen single sheets of specialty paper go for five dollars or more. Cardstock, on the other hand, is the budget hero you never knew you needed. A pack of 50 sheets of good quality cardstock costs about the same as one fancy printed sheet. It holds creases well, it is sturdy enough to hold a flower shape, and it comes in every color you can imagine.
I buy my cardstock from discount stores or dollar stores. Sometimes I even reuse old greeting cards, scrapbook leftovers, or the blank cardstock that comes with some printer paper bundles. If you are really pinching pennies, you can use the insides of cereal boxes (the plain side) and paint them. That is real budget crafting.
Simple folding techniques that look impressive
You do not need a cutting machine, a scoring board, or any fancy tools. I use my fingers, a ruler, and sometimes a butter knife to score folds. The key is patience, not equipment. There are three basic folds that create most cardstock paper flowers: accordion folds, petal folds, and spiral rolls.
- Accordion folds work well for layered blooms like carnations or pom-poms. Cut a rectangle, fold it back and forth like a fan, then pinch the middle and fan out the sides.
- Petal folds let you shape individual petals. Cut a simple teardrop shape, fold it slightly along the center, and curl the edges with a pencil or your fingernail.
- Spiral rolls create roses that look shockingly real. Cut a circle, draw a spiral inside, cut along the spiral, and roll it up from the outside. No glue needed until the end.
Practice each fold on scrap paper before you use your cardstock. That saved me from wasting a whole pack on lopsided petals.
How to assemble a romantic handmade bouquet
Once you have a handful of cardstock blooms, you need to turn them into a gift that says “I care.” I like to use green cardstock for leaves, but honestly, you can also use real twigs or branches from your backyard. Wrap the stems (which are just wooden skewers or thin dowels) with floral tape or strips of leftover cardstock. For a romantic touch, attach a handwritten note to one of the stems.
I have given these bouquets for anniversaries, birthdays, and even just because. They last forever, they don’t need water, and they never wilt. That is a love language right there: a gift that keeps looking fresh. You can personalize the colors to match someone’s favorite flowers or their living room decor. It shows you paid attention.
Affordable supplies you probably already own
You do not need a trip to a specialty craft store. Look around your home first. Here is what I use most often:
- Cardstock (from dollar stores, old school supplies, or recycled packaging)
- Scissors (sharp enough to cut cleanly, but not perfect)
- A ruler for scoring straight folds
- White glue or a glue stick
- Wooden skewers or thin sticks for stems
- Optional: acrylic paint or markers to add color or shading
I once made a whole bouquet using only cardstock from a memo pad and glue from a dollar bin. My friend thought I bought it from a boutique. That is the magic of these cardstock paper flowers: the materials are humble, but the result looks anything but cheap.
Tips to make your paper flowers look more natural
Real flowers have imperfections, so do not aim for perfect symmetry. I like to vary petal sizes and curl edges differently on each bloom. You can also add a tiny bit of shading with a colored pencil or a dab of watercolor. For a more realistic touch, gently crumple the cardstock before folding. The creases mimic natural vein patterns.
Another trick is to layer different shades of the same color. For example, use a lighter cardstock for the inner petals and a darker one for the outer layers. That creates depth without any extra cost. And do not forget the green parts: a simple leaf cut from cardstock and folded slightly down the center makes the whole bouquet look intentional.
Why this makes a perfect romantic gift on a budget
A store-bought bouquet can cost twenty, thirty, or even fifty dollars. And it dies in a week. These cardstock paper flowers cost pennies to make, take maybe an hour of your time, and they last for years. Plus, the act of making them says something that a store receipt never can: you invested your energy, your attention, and your hands.
I have given these to my partner, my parents, and my closest friends. Every time, the reaction is the same: surprise that something so pretty came from such simple supplies. You can pair a few flowers with a homemade card or a small jar of cookies for a truly romantic gift that feels generous without being expensive.
Next time you need a last minute gift or a creative date night idea, grab some cardstock and give these flowers
#cardstockflowers #DIYpapercrafts #romanticgift #handmadeflowers #papercraftideas
Leave a Comment