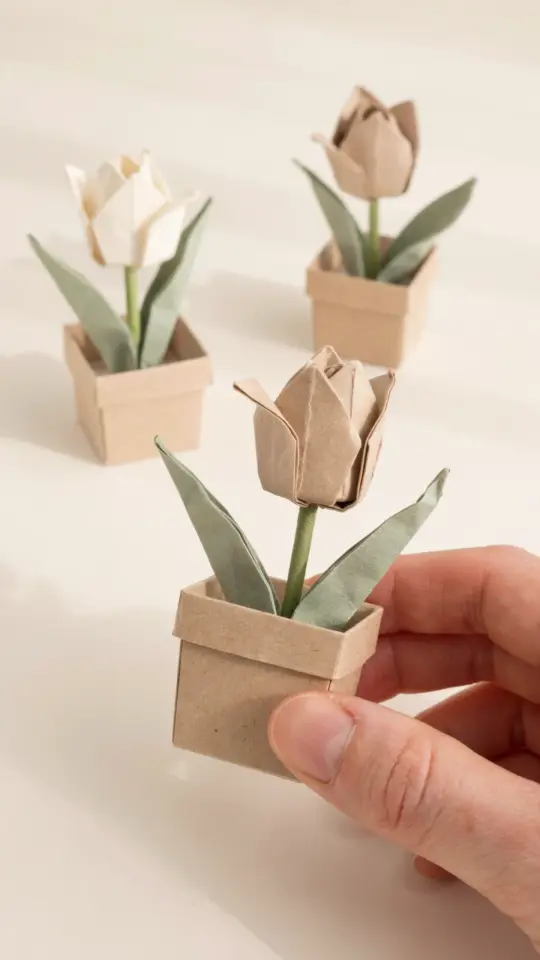
If you have ever wanted to try your hand at paper folding but felt intimidated, start with origami flowers. These simple projects use basic folds, look beautiful when finished, and require nothing more than a square sheet of paper. I have folded dozens of these over the years, and I still think they are the best gateway into the craft. Once you learn a few easy patterns, you can turn a flat piece of paper into a tulip, a rose, or a lily in under ten minutes. No glue, no scissors, just your hands and a little patience.
Easy origami tulip tutorial for complete beginners
The tulip is probably the first origami flower I ever folded. It only needs a few folds, and it stands up on its own or can be placed on a stem made from a green paper strip. Start with a square piece of paper, around 6 inches by 6 inches. Fold it in half diagonally both ways, then collapse into a triangle base. From there you will fold the corners up to form the petals. The whole thing takes maybe two minutes.
What I love about the tulip is that it is forgiving. If your folds are a little off, the final shape still looks like a flower. You can use any color paper, but light pink or yellow gives a very cheerful look. Try making a bunch of them in different colors and sticking them in a small vase for an instant table decoration.
- Use thin paper (standard origami paper works best, but printer paper cut into a square is fine too).
- Crease each fold firmly with your fingernail so the flower holds its shape.
- For a stem, roll a green paper strip tightly around a pencil and glue the edge.
Simple origami rose pattern for homemade gifts
The origami rose looks more complicated than it actually is. I remember being scared of it for years until I tried a beginner version that uses a twist instead of complex reverse folds. There are several variations, but the easiest one starts with a square, creates a series of valley and mountain folds, and then twists the center to form the petals. It does require a bit of patience, but the result is worth it.
These roses make fantastic gifts. You can attach a small card, put them inside a note, or glue them onto a gift box. For a more realistic look, use paper that has a bit of texture or a subtle pattern. I have used scrapbook paper before, and the extra thickness gives the rose a nice sturdy feel. Just be careful not to tear the paper when you twist the center, go slowly.
A single rose can take five to eight minutes once you know the sequence. Practice a few times, and you will memorize the steps quickly. Compared to other origami flowers, the rose has a more three-dimensional shape, so it looks great as a standalone decoration.
Beginner friendly origami lily you can fold in five minutes
The origami lily, sometimes called the iris, is another classic. It uses a waterbomb base (a common starting point in many origami designs) and then splits into four pointed petals. The lily is slightly more advanced than the tulip but still very accessible for a beginner who has done a few folds before. I find it satisfying because the final shape opens up like a real flower.
To make a lily, you will need to do a squash fold on each side. That sounds technical, but it is just pushing the paper open and flattening it in a new direction. Once you get the hang of it, the rest is smooth. The petals can be curled outward by running the edge of the paper over a pencil or your finger. That little curl gives the lily a much more lifelike appearance.
I recommend using two-sided origami paper for this one, so the inside of the petals shows a different color than the outside. For example, white on one side and pale yellow on the other mimics the natural look of a real lily. These flowers look wonderful arranged in a small cluster with some green paper leaves tucked underneath.
Four petal origami blossom for party decorations
If you need to decorate for a party and want something quick, try the four petal blossom. This is essentially a simplified version of the lily, but it does not require the squash fold. It is a great project for kids or for folding in bulk. You can make twenty of these in less than an hour and string them together as a garland, or glue them onto straws for cupcake toppers.
The folding sequence is straightforward. Start with a square, fold it in half both ways, then bring the edges to the center to create a blintz base. Then fold each corner outward to form the petals. That is it. You can stop there or add a little gem sticker in the center for extra sparkle. I used these for a friend’s birthday and they looked lovely hanging across the doorway.
Here is a quick checklist for making a batch of blossoms:
- Cut all your squares ahead of time (3×3 inches works well for small blossoms, 6×6 for larger ones).
- Fold each one in exactly the same way to keep them uniform.
- Use double sided tape to attach them to string or wire.
Origami paper flowers using modular techniques
Modular origami flowers are made from multiple pieces of paper that fit together without glue. They can look very complex, but the individual units are usually simple to fold. The most common modular flower uses between five and eight identical petals that interlock. I find this method rewarding because you can mix colors
#OrigamiFlowers #PaperCrafts #DIYFlowers #OrigamiTutorial #PaperFlowers
Leave a Comment