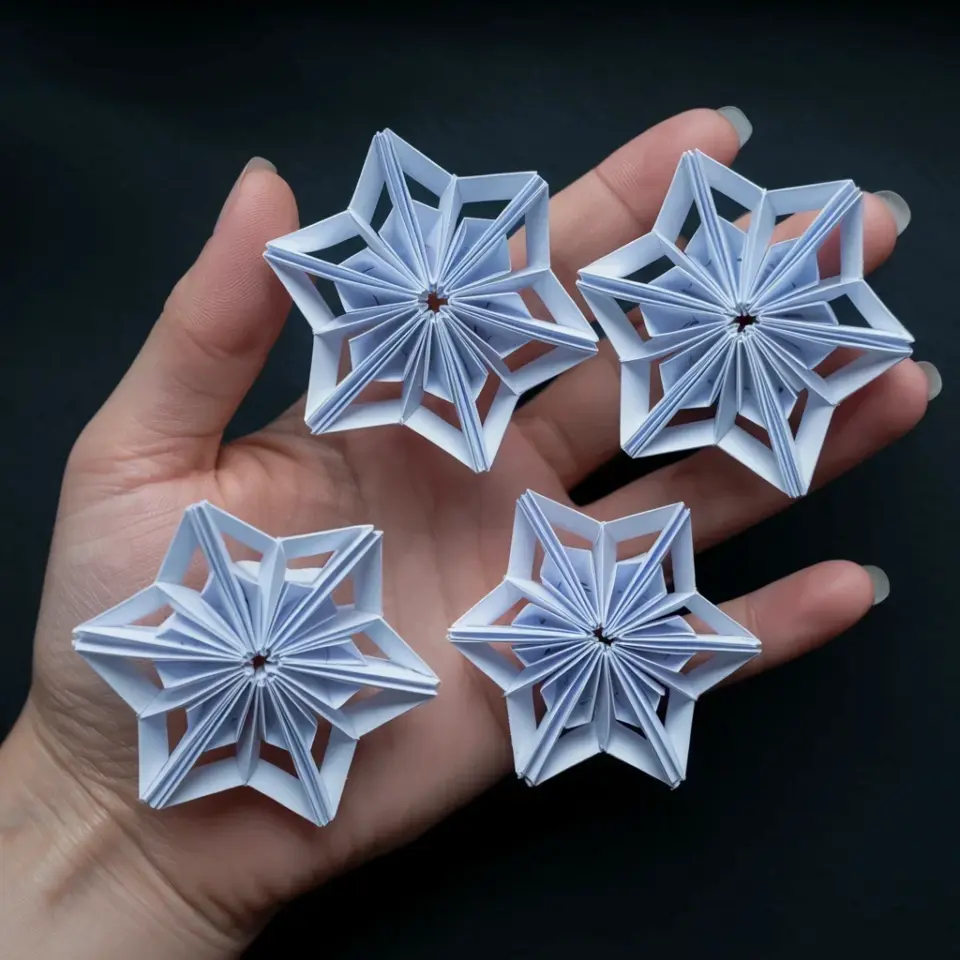
How a Flat Square Becomes a Tiny 3D Star
It still gets me every time. You start with a plain square of paper, nothing special, maybe a scrap from a old notebook or a sheet of origami paper. Then you fold it a certain way, and suddenly it puffs up into this little star. Those Cute Mini Origami Stars feel almost magical. They go from flat to chubby and dimensional in about thirty seconds. Honestly, I usually make them while rewatching The Great British Bake Off. The folding keeps my hands busy during the boring bits where someone is crying over a collapsed cake. It is weirdly satisfying.
But here is the thing. You do not need any special skills. You do not need to be a paper craft wizard. Zero prior knowledge is totally fine. I learned this from a grainy YouTube video years ago and messed up the first three stars. They looked like sad crumpled blobs. I had to watch the slow-motion replay twice. Now I can fold one in under a minute. That is the power of a really simple origami pattern. So let me walk you through it.
Easy Mini Star Origami Instructions for Absolute Beginners
First, you need a strip of paper. Not a square. I know the Pinterest description says square, but technically you cut the square into strips. Or you can buy pre-cut origami star paper strips from a craft store. They are like long skinny rectangles. For a standard mini star, use a strip that is about 1 inch wide and 11 inches long. You can cut that from a piece of A4 or letter paper. I use the leftover margins from printed pages. Feels a bit rebellious. Like I am sticking it to all that wasted white space.
Ok so here is the step-by-step in plain English. Tie a knot at one end of the strip. Yes, like you are starting a shoelace. Pull it tight and flatten the knot. You will see a pentagon shape. Tuck the short tail into the knot. Then start wrapping the long tail around the pentagon. Over one edge, under the next, over, under. Keep going until the strip runs out. Tuck the final bit inside a fold. Now the magic part. Using your thumbnail, gently push in the center of each of the five sides. Just a little pinch. The star will puff up. Do all five sides. You are done.
If that sounds confusing, do not worry. Here is a quick summary of the motions:
- Make a loose knot near the end of the paper strip.
- Flatten it into a pentagon shape. Tuck the short end.
- Wrap the long end around and around until no paper is left.
- Tuck the very end inside a fold to lock it.
- Pinch the five edges inward with your thumbnail to inflate the star.
That is it. Not gonna lie, the first time you pinch, the star might collapse. I have crushed more than a few into little paper pancakes. You learn to apply gentle pressure. It is like a tiny paper soufflé. Patience helps.
Best Paper for Mini Origami Stars (and What to Avoid)
I have strong opinions about this. Loose leaf notebook paper works okay, but it is too flimsy. The star will not hold its shape well. It will look sad and deflated. Glossy magazine pages are a nightmare. They slip too much during the wrapping step. I tried it once out of curiosity. The star ended up looking like a greasy little alien craft. No thanks.
My favorite paper is standard origami paper cut into strips. It is thin enough to fold but stiff enough to hold the puff. You can also use wrapping paper from a gift you received. That gives a nice pattern. But here is a hyper-specific tip: avoid metallic foil paper unless you want frustrated tears. It creases weirdly and the edges cut your fingers. I speak from experience. I had to wear a band-aid for an hour. For a mini origami star. Not worth it.
If you are making a bunch, get a pack of 100 pre-cut star strips from a hobby store. They are like three dollars. The colors are uniform and the length is perfect. No measuring, no cutting. Just folding. That is the route I take when I want to binge a whole season of a show and end up with forty stars scattered on my coffee table. Which happens more often than I care to admit.
Why Mini Origami Stars Are So Addictive to Make
Look, I do not know what it is. Maybe the tactile rhythm. The way your fingers learn the steps without thinking. Or the tiny payoff at the end. You get this cute little 3D star that fits on your fingertip. And then you want another one. And another one. Before you know it, you have made twenty and the trash can is full of paper ends (those little leftover strips). There is something deeply satisfying about a repetitive hand motion that produces a tangible result. It is like knitting but faster and less expensive.
I also love that you can make them anywhere. In a waiting room. On a plane. During a zoom call where you are supposed to be paying attention but the presenter is reading bullet points off a slide. I once made twelve stars during a two-hour team meeting. Nobody noticed. They looked great in a jar on my desk later. That is the other addictive part. The collecting. You start to see stars everywhere. In your coat pocket. Under the couch. But you never throw them away because they are too cute.
Troubleshooting Mini Origami Stars (Common Fails Fixed)
Sometimes things go wrong. Your star will not inflate. Or it falls apart. Or the sides are uneven. That is normal. Here are the three biggest mistakes I see beginners make, and how to fix them without screaming. One: the knot is not tight enough. You need to pull it snug but not so tight that the paper rips. Loose knot equals a loose star that will not puff. Two: you wrapped the strip too loosely around the pentagon. The paper needs to hug the shape firmly. If there is slack, the star will collapse when you pinch. Three: you pinched too hard on one side and flattened it. Use the pad of your thumb, not the nail. A light push is enough. If you hear a crunch, you overdid it. Start over.
Another weird thing: if you cut your own strips, the width matters more than you think. Too wide and the star is clunky. Too narrow and it is fiddly and fragile. A one-inch width is my sweet spot. But I have also used half-inch strips to make teeny tiny stars for earrings. Those are frustrating but adorable. You might need tweezers to do the final pinch. Do not ask me how I know this. I spent a whole afternoon making stars so small they fit under a fingernail. Just because I wanted to see if I could. I could. Barely. Would I recommend it? No. Not for beginners. Stick to a comfortable strip size. Your sanity will thank you.
Ideas for Decorating with Your Mini Origami Stars
Once you have a handful of stars, what do you do with them? I put mine in a small glass jar on my bookshelf. It looks like jar of starlight. That is a bit cheesy but I am okay with that. You can also glue them onto greeting cards. They make an excellent 3D element. Stick one in the middle of a birthday card. Or scatter a few across a scrapbook page. They add texture and whimsy without much cost.
Other ideas: string them on a thread to make a garland. Use a needle and fishing line. Knot each star in place. Hang it above your desk or in a window. They catch the light nicely. Or glue a tiny magnet on the back and put them on your fridge. I have one holding up a grocery list right now. And if you want to be extra, fill a clear Christmas ornament with them. They look like a constellation. Nobody will guess you made them while watching TV. They will think you are super crafty. Let them think that. You can keep the messy coffee table secret to yourself.
Why This Craft Works When Other Paper Projects Fail
I have tried a lot of paper crafts. Some are too fiddly. Some require glue that gets everywhere. Some need you to cut curves with tiny scissors and I just do not have the patience. But mini origami stars are different. They are forgiving. You can mess up the wrapping and still salvage it. The final pinch covers a lot of sins. Plus there is no waiting for glue to dry. No measuring tape. No trip to the craft store for special supplies. Paper and hands. That is it. This is the kind of DIY that feels genuinely relaxing, not frustrating. That is rare. I think that is why people get hooked. It is low stakes. You lose nothing if one star fails. You just crumple it and try again. The next one will puff up perfect. And then you are off to the races.
Maybe you will make a few and stop. Or maybe you will end up like me, with a stash of stars in every bag and coat pocket, giving them to friends like they are tiny treasures. Either way, it is worth trying. So grab a strip of paper. Fold one. See if you can stop at just one. I dare you.
Leave a Comment