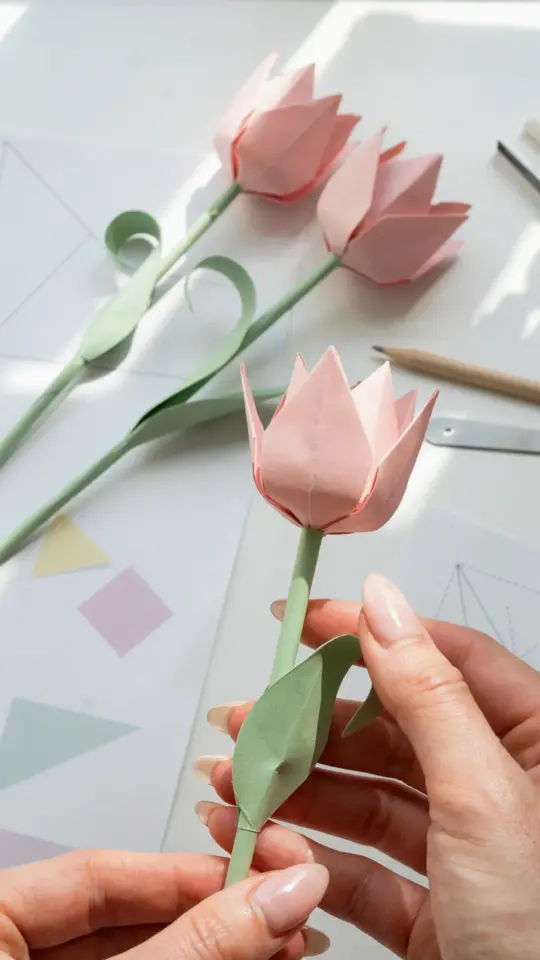
I’ve been folding these tulip origami tulips every spring for years now, not gonna lie. They’re the cheapest way to make my windowsill look like a Dutch garden without spending a dime on fresh flowers that die in a week. And honestly, this tulip origami tutorial is so simple you can teach a kid to do it while dinner burns on the stove. (Ask me how I know that one.)
Why Origami Tulips Are Perfect for Spring on a Budget
Fresh tulips from the grocery store cost what, five or six bucks a bunch? And they droop in three days. Not great for a tight budget. But paper tulips? They cost pennies. Less than pennies if you use paper headed for the recycling bin. Look, I’m not saying you should dig through the trash, but that old magazine you were going to toss? Perfect for a test fold. The texture gives the petals a neat worn-in look. And you can make twenty tulips for the price of one sad grocery bouquet. That math works for me every time.
Spring crafts don’t have to drain your wallet. Here’s the thing: most people overthink materials. You don’t need fancy origami paper from Japan. A sheet of copy paper cut into a square works fine. It’s a little thicker, holds a crease better in my experience. So if you’re on a budget, just use what you have. Scrapbook paper leftovers, old maps, even the white pages of a book nobody reads anymore. The tulip still looks like a tulip.
What You’ll Need for This Easy DIY Paper Flower Project
Let me list the absolute essentials so you don’t waste money on specialty tools. I’ve made these with nothing but my hands and a square of paper. Seriously. But having a few things helps avoid frustration.
- A square piece of paper. Any size from 4×4 inches to 8×8 inches works. Smaller for miniature tulips, bigger for a statement bloom. I use 6×6 the most.
- Optional but helpful: a bone folder or the back of a butter knife to sharpen creases. A dull crease makes a floppy flower. Not ideal.
- Green paper or a green drinking straw for the stem. Honestly, you can even use a real twig from your backyard. Free and it looks rustic.
- Glue stick or a dab of white glue if you want to secure the tulip to the stem. Some people don’t glue at all. The tulip stays together by itself, but it can slip off a smooth straw.
- Scissors if you need to trim the square from a rectangle. Or just tear it. I do that sometimes when I’m lazy. The rough edge hides in the fold anyway.
One weird thing: avoid glossy photo paper. It resists creases and the tulip won’t hold its shape. I learned that the hard way after ruining a sheet of expensive presentation paper. Stick with matte or standard copy paper.
Step-by-Step: How to Fold Your Tulip Origami
Ok so here’s the process. I’ll keep it short because once you do it, you’ll remember it forever. First, fold your square in half diagonally both ways to make an X crease, then flip it over and fold in half horizontally and vertically to make a plus sign. That gives you a blintz base, which is just a fancy way of saying you collapse the paper into a triangle shape. Push the sides in and flatten. You’ll have a smaller triangle with a pocket on each side.
Now fold the bottom corners up to the top point, both sides. It’ll look like a little kite. Then fold those same corners outward again, but this time you’re making a tiny triangle flap on each side that points out. Flip the paper over, repeat. After that, open the bottom and blow into the hole like a balloon. Gently puff until the petals puff out. Not too hard or the paper tears. I’ve popped a few in my day. That’s the whole thing. Four basic folds plus one blow.
If that sounds confusing, believe me, it’s simpler than it reads. Watch a video if you need to. But honestly, after two tries you’ll fold it blindfolded. I once made one during a boring conference call and nobody noticed.
The Stem and Leaf Trick (Because a Flower Needs a Stem)
A tulip floating alone is cute but a stem makes it feel real. For a budget-friendly stem, I use a green plastic drinking straw from a party pack. Cut a small slit at the top, slide the tulip’s bottom hole over it, and add a dab of glue inside. Hold for ten seconds. Done. But if you want something more natural, grab a thin twig from outside. Peel off any bark bits and wedge the tulip onto the tip. The twig’s uneven texture actually grips better than a smooth straw.
Leaves? I fold a separate strip of green paper in half lengthwise, then cut a simple leaf shape. Unfold it, curl the tip around a pencil for a curve, then glue it onto the stem. Or don’t. Honestly, sometimes I skip leaves. The tulip alone reads perfectly fine. But if you’re making a whole garden for a centerpiece, leaves add that extra realistic touch. You can even use real leaves from outside pressed flat. Why not. It’s spring.
Ways to Use Your Paper Tulips Without Spending Extra
You’ve got a pile of paper tulips now. What to do with them without buying vases or ribbon? I’ve got a few ideas that cost zero extra.
- Stick them in a mason jar, a tin can with the label peeled off, or even a cleaned-out yogurt cup painted with leftover nail polish. Looks intentional.
- Use them as place card holders for Easter dinner. Write a name on a tiny square of paper and tape it to the stem. Guests love it. No extra purchase needed.
- Tape a tulip to a wrapped gift instead of buying a bow. A flower is way more personal. And free.
- Thread a string through the bottom hole and make a garland for a doorway or over a window. Use baker’s twine if you have it, or regular sewing thread. Nobody looks that close.
- Put one on your computer monitor to remind you that spring exists even when you’re stuck inside working. That’s my go-to.
One time I made a whole bunch and gave them to neighbors with a note that said “flowers that don’t wilt.” Two of them asked me to teach them the fold. Small world.
One Weird Thing I Learned About Paper Selection
So here’s a random but helpful detail. I once tried using those thin pages from a phone book (remember those?). They fold beautifully but the tulip collapses under its own weight. It’s like a sad deflated balloon. On the other hand, cardstock is too stiff. You can barely blow it open. You need something in between. Standard 80gsm printer paper is the sweet spot. If you have origami paper, great, but don’t buy a whole pack just for this. Ask your office if they have scrap paper you can take. Or use the inside of an envelope. The white kind. I’ve done that. The glue seam actually adds a cool texture line along one petal. Accidental art.
Want to Make a Bunch? Here’s How to Speed Up the Process
If you’re making a dozen tulips for a spring party or a Mother’s Day gift, doing one at a time will take forever. Set up an assembly line. Pre-cut all your squares. I use a paper cutter, but scissors work. Just stack the paper and cut through multiple sheets at once. Then pre-fold the creases on every square before you start the blintz base. That saves so much time because your hands get into a rhythm. I can fold a tulip in under 30 seconds now. Not bragging, just saying, repetition makes it automatic. Put on a podcast or a show you don’t have to watch. The folding becomes meditative. And you end up with a whole bouquet by the end of one episode.
Also, if you’re making stems, pre-slit all your straws or twigs before you start. Then glue the tulips on in a batch. Let them dry upside down with the stem sticking up. Sounds silly but it keeps them from puffing unevenly. I rigged a drying rack from a cardboard box and some paper clips. Ghetto engineering at its finest.
So there you have it. A full budget-friendly spring craft that costs almost nothing and looks like you put in effort. I hope you give it a try and maybe make a bunch for someone you love. Fold a tulip, put it on your desk, and enjoy the fact that you made something with your own two hands. That’s a good feeling. If you do make some, I’d love to hear how it went. Drop a comment or tag me in a photo somewhere. Happy folding.
#origami #tulip #paperflowers #diy #springcrafts
Leave a Comment